


We are constantly seeking ways to create sleek and impressive experiences, and the journey from idea to final implementation is always a long one. In this article, we will delve into the creation process of one of our recent projects, exploring different options and discussing their pros and cons.
Creating interactive experiences with the use of 3D animation.
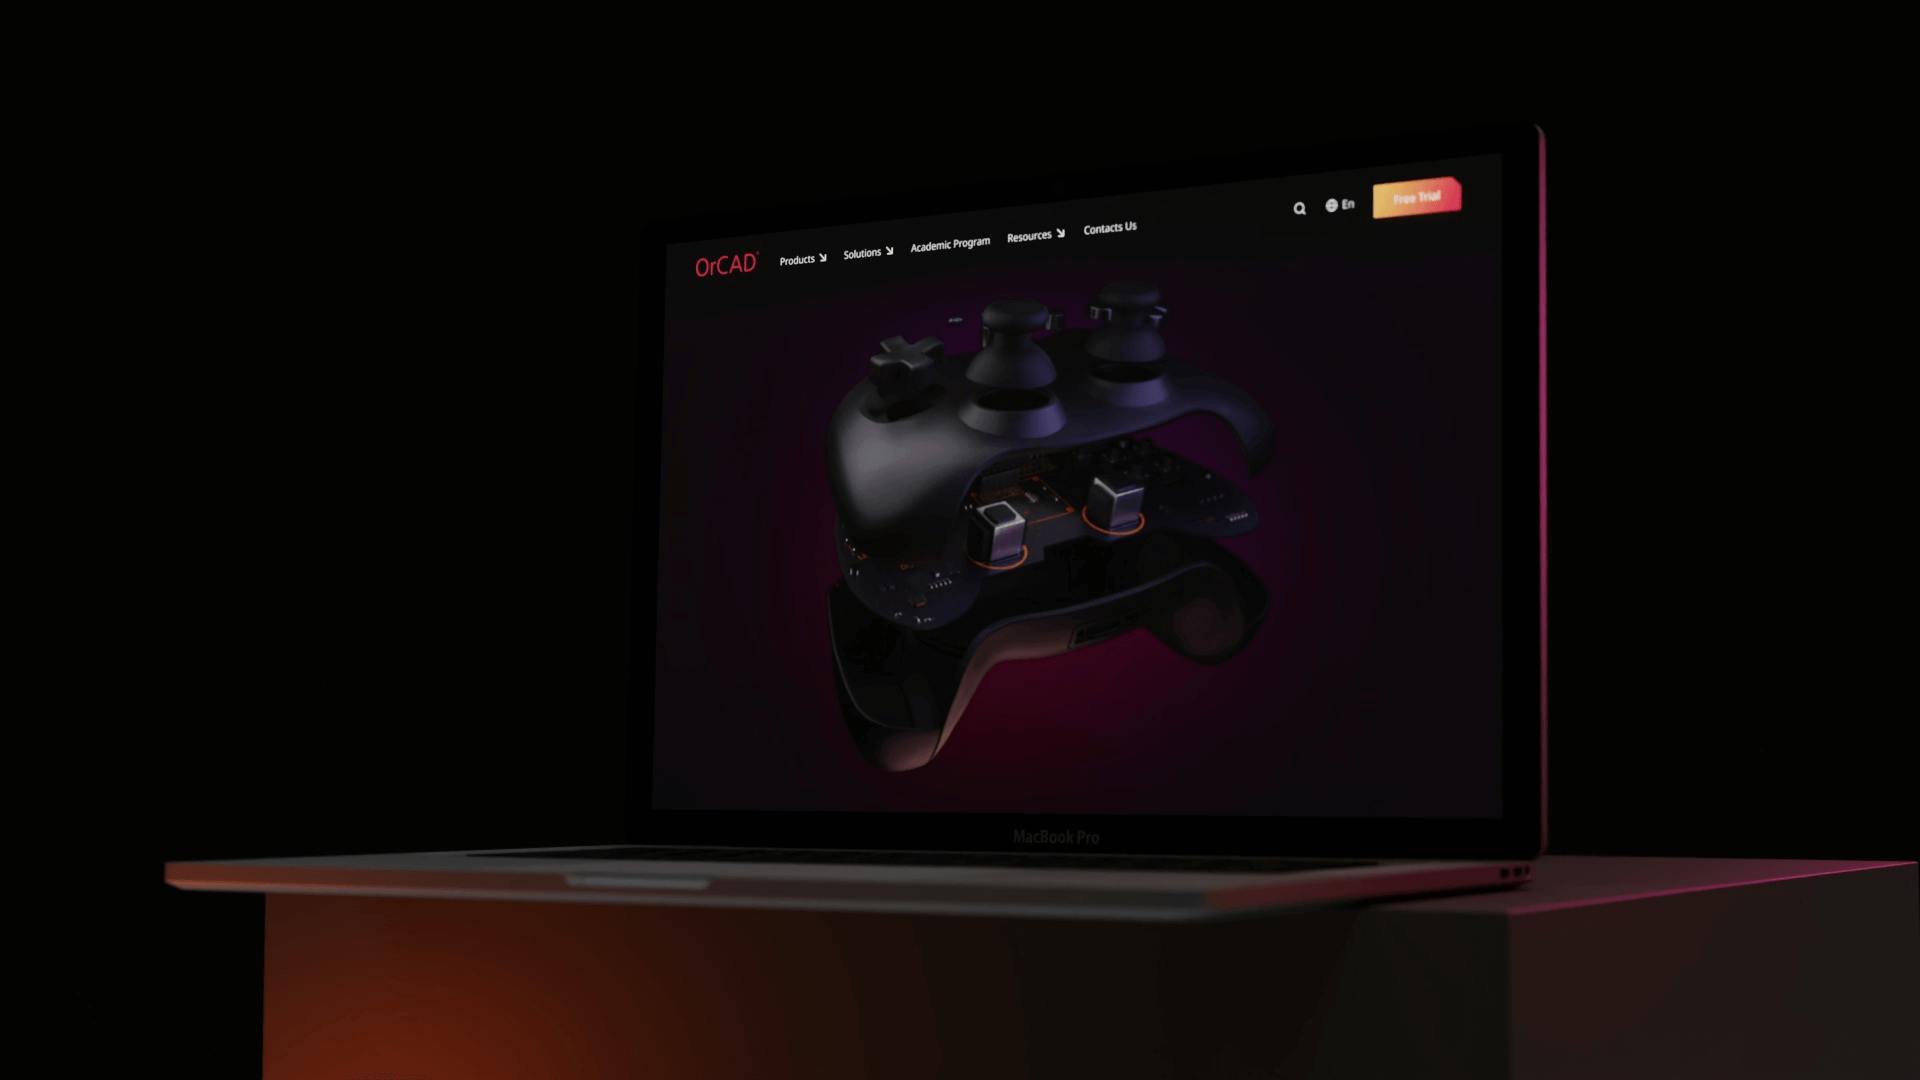
An enterprise website for OrCAD
Cadence, a leading electronic systems design company, approached us to give their 20-year-old website a fresh, modern look that would resonate with their young, tech-savvy audience. Leveraging Webflow, with whom we are an enterprise partner, we embarked on this important project.
One of the key objectives for this project was to create a visually compelling representation of the product's core concept. To achieve this, we developed complex animations that effectively conveyed the important textual information on the homepage.
Goals of the interactive animation
- Showcasing real-life usage of the client's product.
- Designing simple yet captivating animations.
- Ensuring seamless implementation as the website was built using Webflow.
What to start with when creating 3D animations for a website?
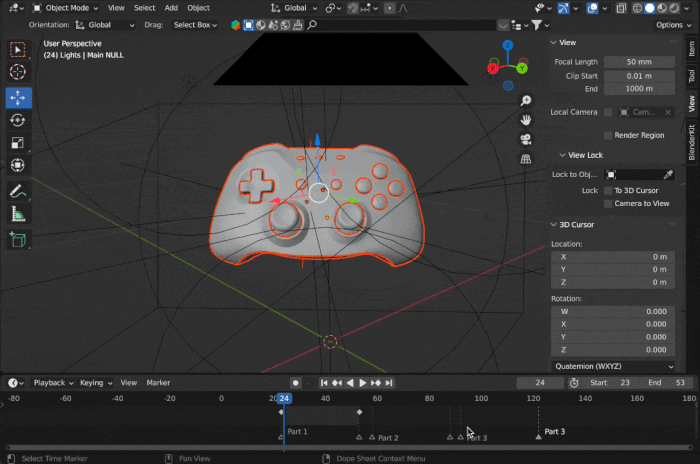
To begin, we needed to finalize the 3D model and interaction we wanted to incorporate. We iterated on creating a gamepad model until we achieved the desired result.
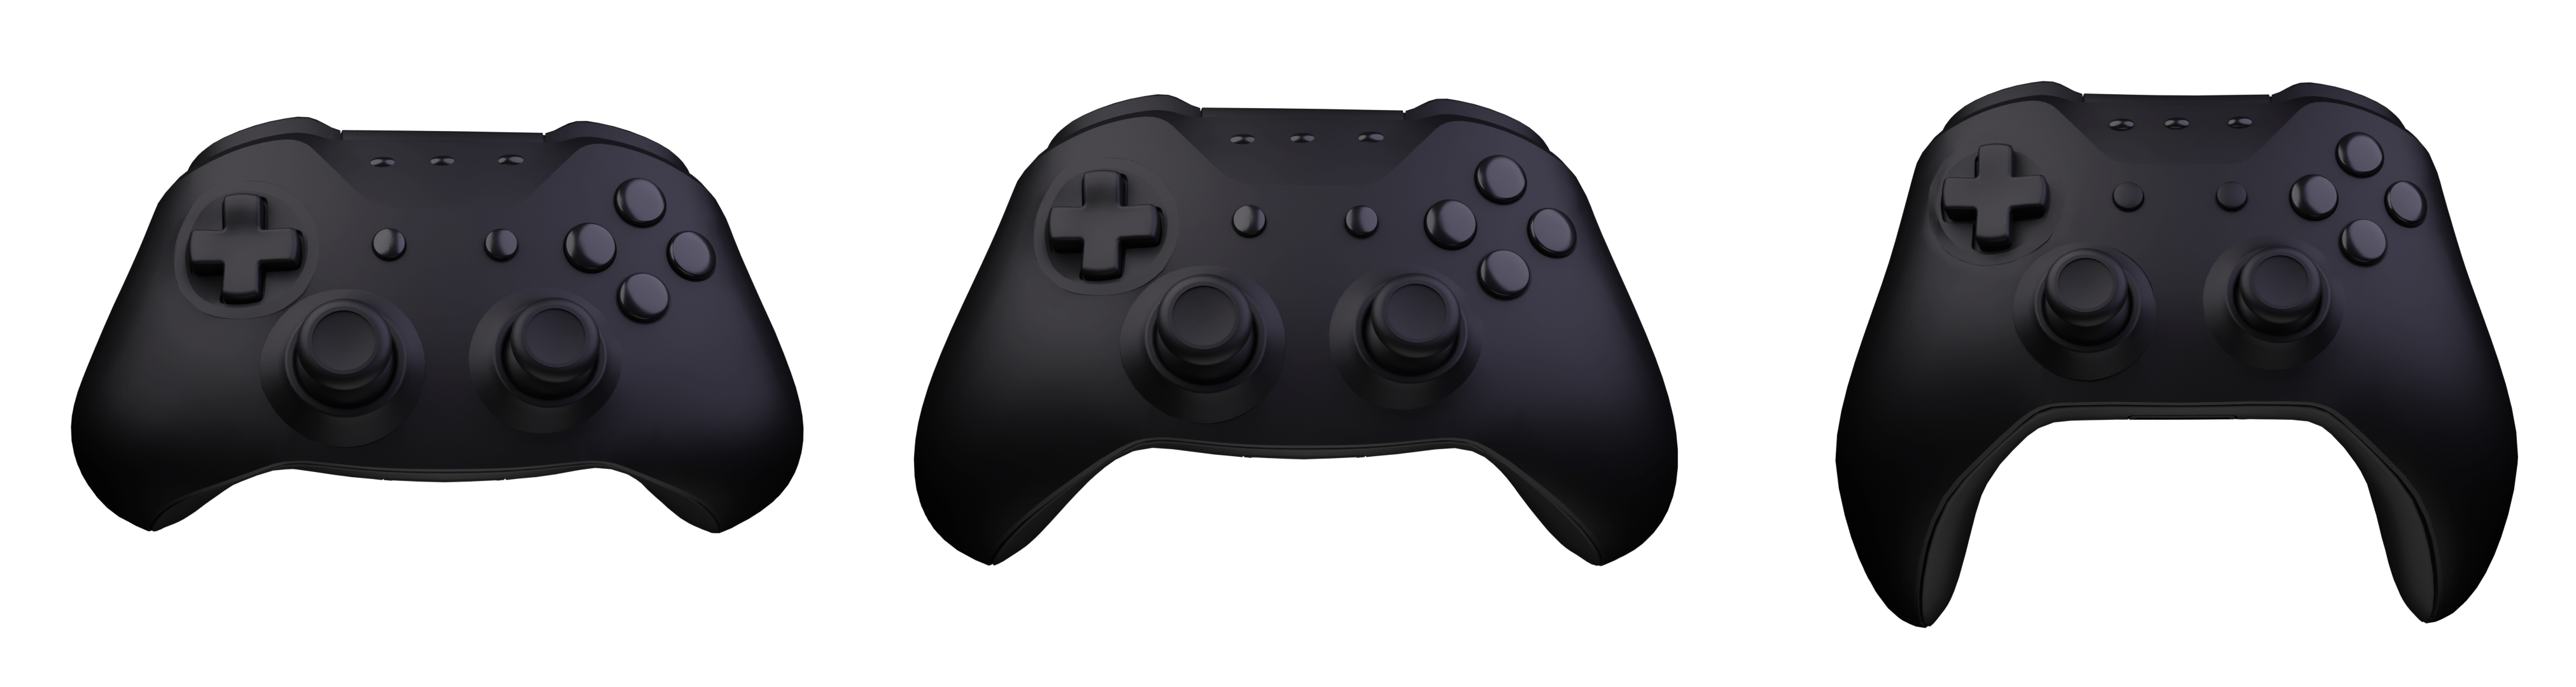 Multiple gamepad 3D model design iterations showing different controller styles, button layouts, and ergonomic variations for website animation selection
Additionally, we optimized PCB 3d model from a client to enhance its performance and rendering speed.
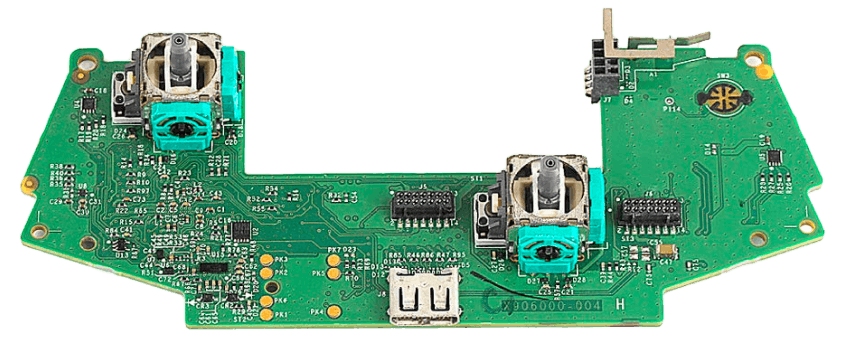 Optimized printed circuit board PCB 3D model with electronic components, circuit traces, and technical details for web performance and rendering speed
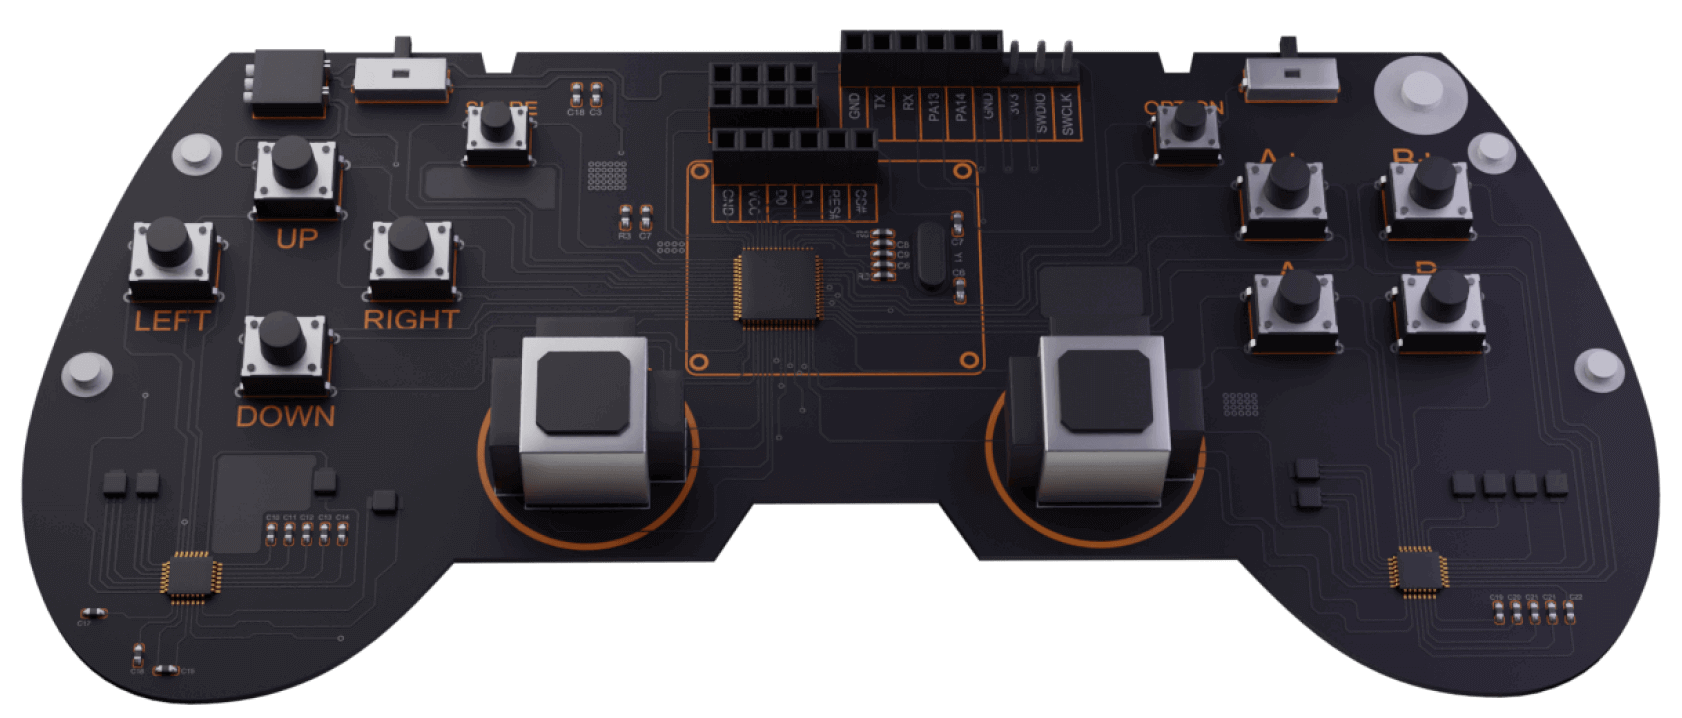 Before and after comparison of PCB 3D model optimization showing reference design versus final optimized web-ready model with improved polygon count
Then, we created an electric circuit board to which we transitioned from PCB.
 3D rendered electric circuit board with detailed electronic components, capacitors, resistors, and integrated circuits for website animation transition
 Close-up 3D render of electronic circuit board showing intricate component placement, solder points, and circuit pathways for technical product visualization
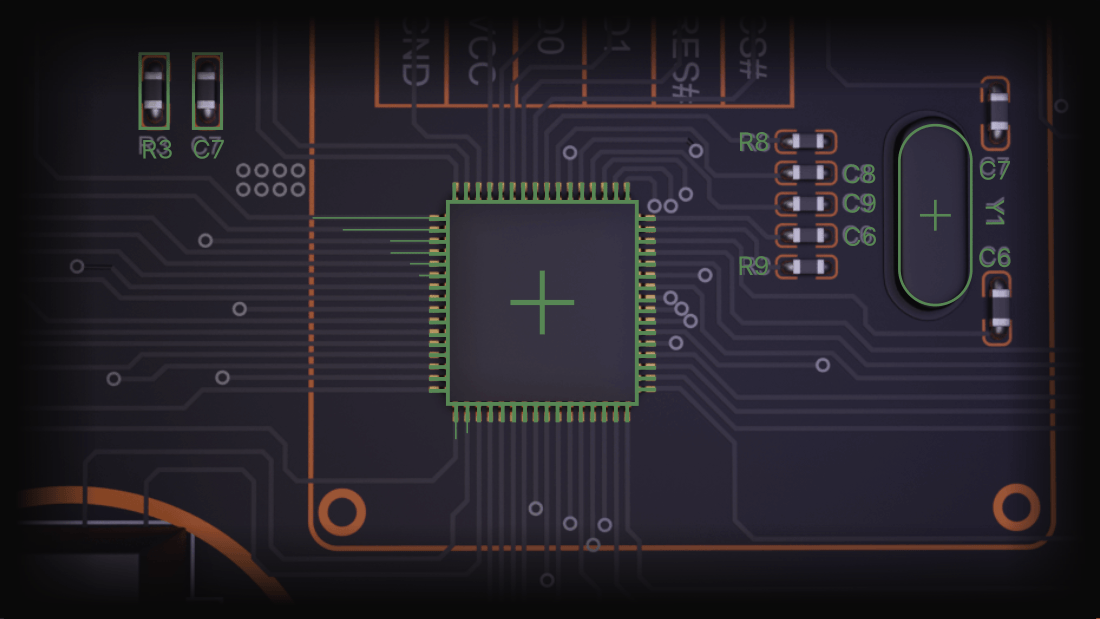 Close-up 3D render of electronic circuit board showing intricate component placement, solder points, and circuit pathways for technical product visualization
On-scroll animation
The main idea was to animate the gamepad while the user scrolled the page, with accompanying text blocks explaining the key aspects of the client's project. We seamlessly combined the gamepad and printed circuit board (PCB) in a smooth transition, showcasing the different parts of the product.
Our design process step by step:
1. Combining all the parts of the gamepad
 Animated electric circuit board transition from 3D model to schematic diagram showing smooth morphing effect for on-scroll website animation storytelling
2. Animating the decomposing of the gamepad
 3D animation showing gamepad assembly process with parts coming together, demonstrating scroll-based interactive animation technique for enterprise websites
3. Remembering key things while working with 3D: materials and lighting
This is one of the most important parts of the process because the materials and lighting should align with the overall style of the website and add visual depth to the final product on the site.
For example you can see the difference between standard lighting, ambience custom lighting that we created, and the final result with small accent on the PCB board.
 Exploded view 3D animation of gamepad disassembly revealing internal components, buttons, PCB, and housing for interactive product storytelling on websites
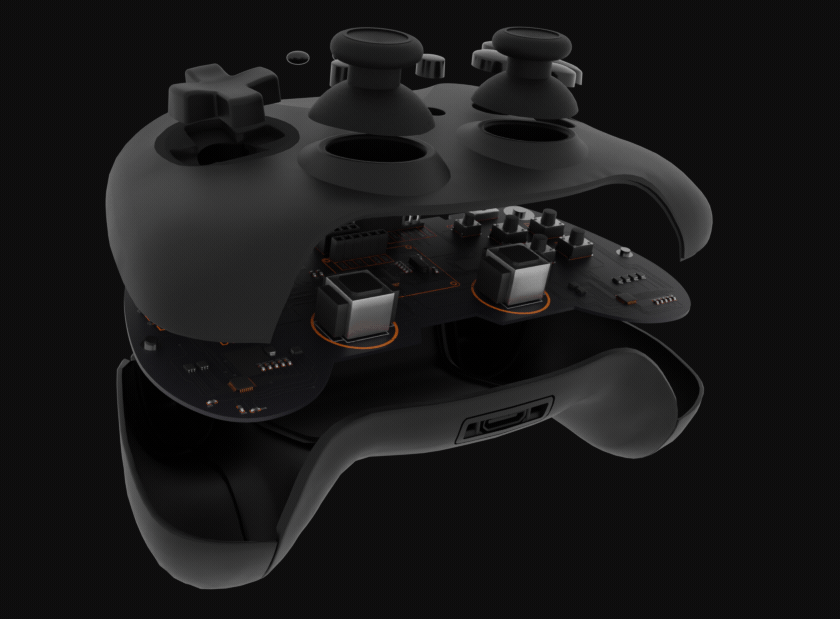 3D rendering lighting comparison showing standard lighting versus custom ambient lighting and final result with PCB accent for professional web animation quality
When you working on lighting keep in mind color palette of the website and the mood you want to transmit to the user.
4. Combining 2D and 3D animations
Here the only thing we needed to do is to animate the circuit board and combine it with our 3D rendered part.
The only challenging part was to create smooth transition from circuit board to drawn scheme.
5. Creating animations for mobile version of the website
The animation you see above is for our desktop version of the website. But for the mobile, it was important to make something even more simple.
To achieve this goal we divided the main animation into smaller parts and replaced 1 part of the animation with a static image. This way we were able to improve performance and user experience.
Goal 3: Simpify implementation (formats comparison)
When it came to implementing our animations, we had several options to consider. However, one crucial aspect that influenced our decision was the need to combine both 3D and 2D animation for the final user experience. Let's explore the options we evaluated.
Image Sequence
The simplest method to implement 3D animations without using actual 3D files is by rendering and utilizing image sequences. Nevertheless, we encountered a challenge with the file size of the final outputs. Since our animation was to be used on the homepage, we couldn't afford to compromise performance metrics. Here's a handy trick for you: optimize the image size of each rendered frame using tools like TinyPNG. By doing so, you can significantly reduce the file size. Additionally, consider using every second frame instead of every frame, adjusting the playback speed to 0.5x for a lighter file.
Video
Video format is often favored by motion designers but may not be the best solution for development, especially in our case. Although videos can be played through scrolling, optimizing each frame and finding the right balance between file size and quality is more feasible with image sequences. Videos also present challenges in terms of loading, particularly when a user scrolls quickly and the video hasn't fully loaded. Waiting for complete loading is not an ideal option in such scenarios.
JSON
Another option we explored was using JSON format. The process involved importing our renders from 3D software into After Effects and rendering a JSON file with the Bodymovin plugin. We could then directly import the JSON file into Webflow. This approach, although not as straightforward, offered advantages. We were able to optimize the 2D part of the animation, reducing its file weight compared to a complete sequence render. Additionally, the final quality of the 2D elements was significantly improved. To create the JSON file, we extensively tested and refined the animation using Bodymovin for After Effects. We also experimented with different rendering and implementation options, such as breaking the animation into three parts based on text blocks on the website or rendering it as a single piece. Ultimately, we found that keeping the animation intact provided more stable results on desktop.
3d format (glb/gltf, obj, fbx)
While there are numerous options available to use 3D formats directly on websites, it wasn't a suitable choice for our project. We had specific reasons for this decision. Firstly, we couldn't implement 3D files directly in Webflow, which was a crucial requirement for us. Additionally, optimizing complex models with intricate details, as we had in our case, would have required significant time investment. Lastly, we couldn't seamlessly combine 2D and 3D animation, which was a specific requirement for our project.
For our case, we ultimately chose the JSON format. This allowed us to reduce the file weight while achieving better image quality on the website, meeting our specific needs and goals.
3D animation implementation process
When it comes to the implementation process, developer involvement is crucial from the early stages. This allows the entire team to define the animation implementation method and gain valuable insights from a developer's perspective. Once the method is determined and all the necessary resources are gathered, the development process can commence.
Since we had already chosen to work with Webflow, it's important to consider its strengths. Webflow offers a native tool called Lottie (JSON) that simplifies the implementation of animations. Additionally, Webflow provides clear and easy options for custom code implementation, which may be required for incorporating PNG sequences seamlessly. The platform also offers built-in tools for adding videos, whether through links from external sources like YouTube/Vimeo or by directly uploading background videos to the Webflow server. Embed codes can also be used for video integration in specific cases. However, it's worth noting that video implementation in Webflow has certain limitations:
- File size limitations: Webflow imposes restrictions on the size of uploaded video files. This can be problematic when dealing with high-quality or long-duration videos.
- Video format restrictions: Webflow supports a limited number of video formats. If your video does not match these formats, you will need to convert it to a supported format before uploading.
- Video controls limitations: Webflow provides a limited set of video controls. If you require more complex video interactions such as play, pause, or rewind, you may face limitations within the platform.
 3D gamepad animation demonstrating various lighting setups and material rendering techniques for optimized web implementation and visual depth enhancement
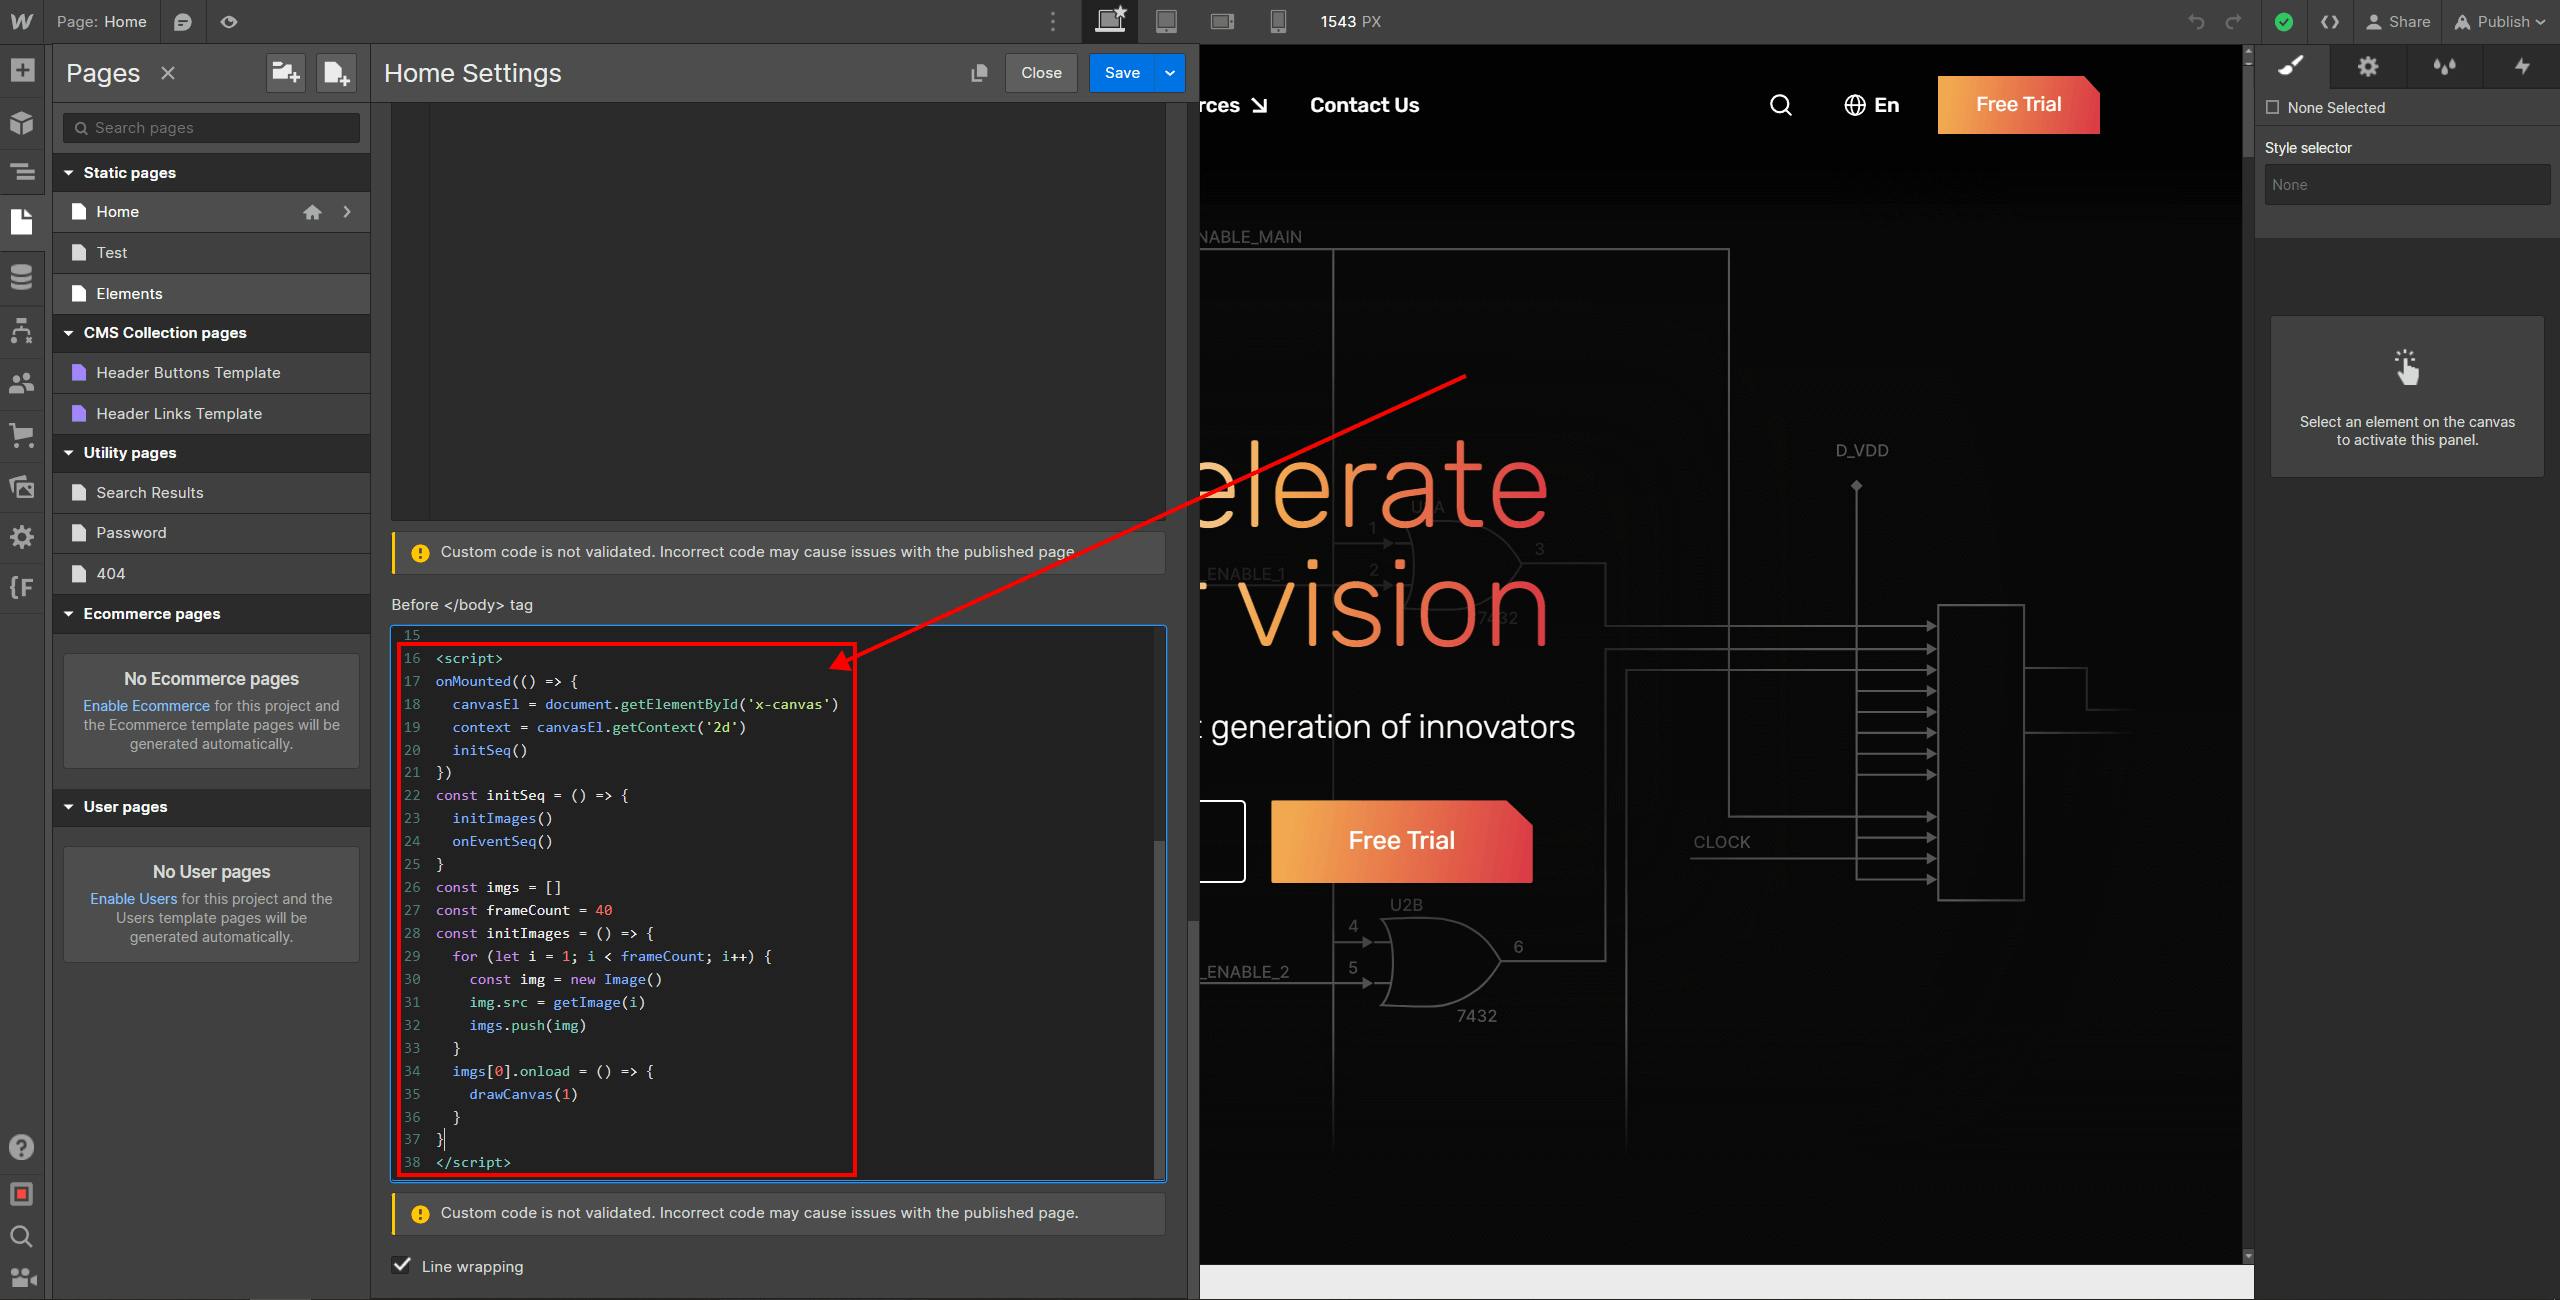
Given these considerations, we opted to use the Lottie file method, embedding a PNG sequence within a JSON file. During development and testing, we discovered that the Lottie file itself can still have a significant impact on site performance, resulting in slower loading times.
To address this challenge, we took a step back and devised a perfect solution: uploading the sequence frames to an external server (e.g., Dropbox, Google Drive, personal server). We then utilized Webflow's native developer tool, specifically the custom code section under the "after body" segment, to incorporate the necessary code for implementation. Through rigorous testing and optimization, we aimed to strike the optimal balance between site loading speed and animation quality, focusing on factors such as smoothness, speed, and frame quality.
As a result of our efforts, we achieved the desired outcome, experiencing a 23% increase in site performance. This approach allowed us to implement the animation without sacrificing site speed and overall user experience.
Final thoughts and suggestions for your interactive websites
As you embark on your future projects involving interactive animations, here are some important considerations to keep in mind:
- Define Goals and Requirements: Begin by clearly defining the goals and requirements of the animation you aim to create. This will provide a solid foundation for the entire project and ensure alignment with your objectives.
- Choose the Right Format: Decide on the most suitable format for your animation, be it video, image sequence, JSON, or a 3D format. This choice will have implications for the process of creating your models and animations, so consider the specific needs and desired outcomes of your project.
- Prioritize Optimization: Regardless of the format you choose, optimization is key. Strive to make the final file size as small as possible without compromising on the quality and visual impact of the animation. Optimal file sizes contribute to faster loading times and an improved user experience.
- Test, Optimize, and Iterate: Testing and optimization are ongoing processes. Continuously test your animation, analyze the results, and make necessary optimizations. Don't hesitate to take a step back and redo certain aspects if it leads to better outcomes. This iterative approach ensures that your animation reaches its full potential.
- Simplify for Mobile experiences: Keep in mind the importance of simplifying the mobile version of your animation. Mobile devices have unique limitations and considerations, so it's crucial to create a sleek and simplified experience that works well on smaller screens. Adapt your animation to fit the mobile environment seamlessly.
By following these guidelines, you can effectively plan and execute your interactive websites and immersive experiences, ensuring they align with your goals, deliver optimized performance, and provide a seamless experience across various devices.
Here you can find award winning website design examples we’ve created:
- Noomo Labs - a place for cutting-edge immersive experiences, 3D websites, AR activations, and interactive web experiences. What was happening behind the scene read in this article.
- The Silly Bunny — A highly immersive and interactive website for children’s book, with AR experiences and 3D animations.(You can find more details in our Case Study)
- Olha Uzhykova portfolio website — good example of interactive animations. (You can find more details about design process in this article Beyond Pixels and Code: Crafting your unique story trough creative website design)
- ITG Digital — a craft and creative website for SaaS product.
- Middle — a fintech website for a game-changing digital platform for the mortgage industry in Australia. (You can find more details in our Case Study)
- OrCad — an enterprise website design built with Webflow. (You can find more details about design process in this article How to effectively implement 3D animation on a website and, of course check our Case Study)
- Learn more about Increasing User Engagement with 3D, AR, and Immersive Web Experiences.
- Elevate marketing and sales by using immersive web experiences.
- How 3D configurators help brands increase engagement and improve user experience.